
I remember when I was planning to make my very first cake, back in 2010. It may sound silly, but it was frightening. I had no idea what to do, or how to do it. I was browsing youtube for hours to find tutorial videos that could help me. SO much could go wrong! I ended up making a red velvet cake with cream cheese frosting (I think), and it turned out perfectly fine. Not scary at all!
After that, I was hooked, and since then I’ve made many, many cakes, and it’s still one of my favorite things to bake. Even if I was hooked immediately, I did struggle every now and then and there have been lots of tears and swearing (to never ever bake a cake again!) in my kitchen. I’m not saying I make absolutely perfect cakes, but after lots and lots of practice, I feel pretty confident when it comes to cakes. There are some things to keep in mind though that have helped me a lot, and I will try my best to guide you through them.
Tips & tricks
-If cakes (as in the cake layers) are rounded on top, trim them with a sharp bread knife to make them flat.
-Buttercreams have to be at room temperature when using, but cream cheese is generally fine when cold. Whipped cream should be used immediately when whipped. If you have leftover buttercream in the fridge that you want to use, bring it to room temperature and re-whip until creamy and smooth.
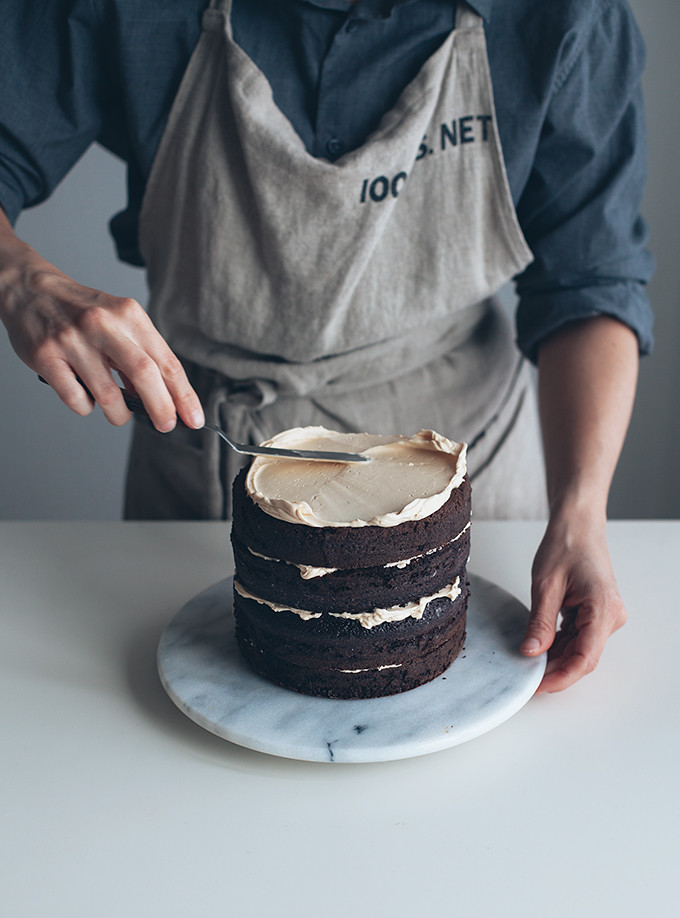
-An offset spatula (as shown in the photos) is a very helpful tool. I prefer to use a small one but any size you are comfortable with works. It’s also a great tool for making swirly patterns in your cake!
-Smaller cakes (as in diameter) are generally easier to work with, I think. The cake layers don’t break as easily and cutting a 6-inch cake in layers is easier than a 10-inch cake.
-Filling and frosting a cake with buttercream is a lot easier, and more stable than for example whipped cream. And the cake holds up much better in warm weather.
-If you want perfectly even layers of frosting inside the cake, use a measuring cup to measure the amount of frosting you put on each layer.
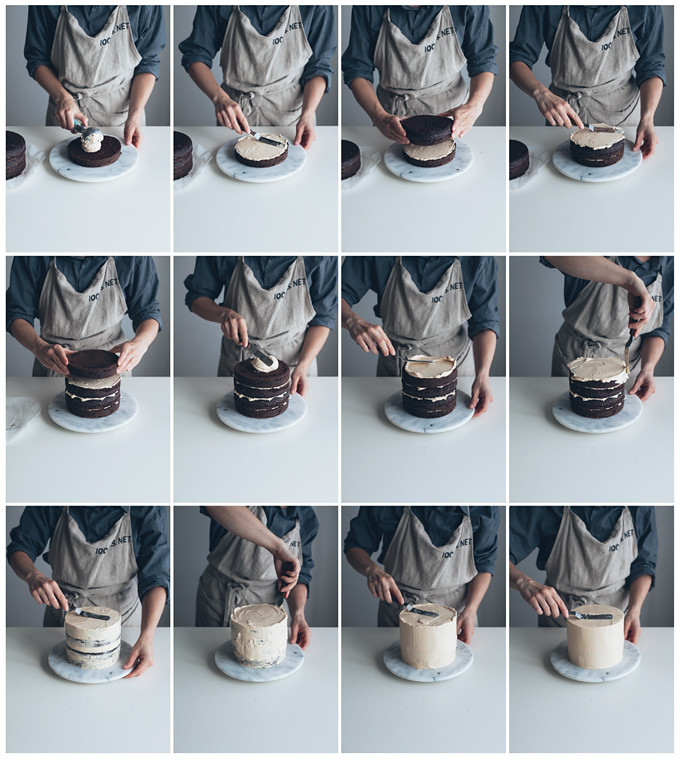
-For a nice, clean edge on your cake, always put the last layer as in picture 5 below! This really helps.
-Buttercream and frostings can do wonders to an uneven cake and cover flaws, but it’s always a good idea to build a stable foundation. This will make the covering much easier, and you will end up with a more even cake.
-Some cakes are more crumbly than others, that’s why “crumb coating”, which means spreading a thin layer of frosting all over the cake before putting on the “final” layer is a very good idea. This prevents any crumbs from ending up on the surface of your finished cake.
-Using a turntable when frosting cakes makes life so much easier!
-If you cake feels unstable and wobbly, this tends to happen when cakes are very high and when they are filled with for example curd, jam or cream, insert a skewer slightly taller than the cake in the center of the cake, then put in the fridge until stable. I find this very helpful as it keeps the layers from sliding apart. Just don’t forget to remove the skewer before serving!

Picture 1.
Place the first layer on a thin cake board or directly on a cake stand. Measure the filling with an ice cream scoop or something similar that you know will contain about the same amount of filling for each layer.
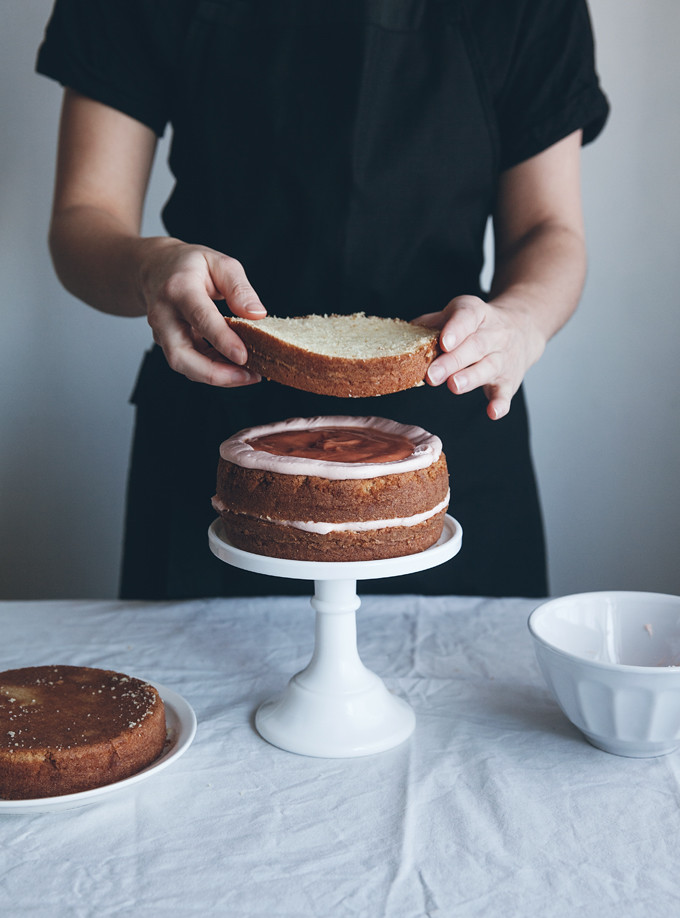
If you have a different filling in the cake, like a curd or jam (as in photo number 2 in this post), you don’t want it to pour out the sides and mix with your “exterior” frosting – simply pipe some frosting around the edge and put the filling in the middle.
Picture 2.
Spread the filling in an even layer using an offset spatula.
Pictures 3 & 4.
Stack the next layer, and repeat the above steps. Continue the same way, spreading the same amount of filling for each layer until you have used three of the layers (that is, if you’re making a four layer cake).
Picture 5.
Place the last layer on top, cut side down, to avoid crumbs on the cake surface and to ensure smooth, straight edges. If the cake feels unstable, cover the cake with plastic wrap or a cake cover and refrigerate for 20 minutes before continuing. If the cake feels stable, continue to step 6 without refrigerating.
Pictures 6 – 9.
Drop a relatively large amount of frosting on top of the cake and spread the frosting in an even layer across the top. Let any extra frosting hang over the edge, and then spread it down the sides. Spread a thin layer all over the cake, to secure any crumbs (this is called crumb coating). Put the cake in the refrigerator for 15-20 minutes to firm up the first layer.
Pictures 10 – 12.
Take the cake out of the refrigerator, and spread the next layer of frosting on the top of the cake. Continue down the sides all around the cake as before. Even out the sides and then the top of the cake by carefully drawing the offset spatula up and over the edge and in toward the center so that any extra frosting is pulled toward the center of the cake. To achieve a super smooth surface, dry the spatula completely between each pass. You can also dip the spatula in hot water and dry it between each pass, this also really helps making the surface smooth.
Now you have a perfectly covered cake! Now to the fun part, decorating. Do whatever you feel like, do some piping, patterns with your offset spatula, or just leave it plain!
Hope this was helpful!